How to Sharpen a Morakniv Companion Using Only a River Rock
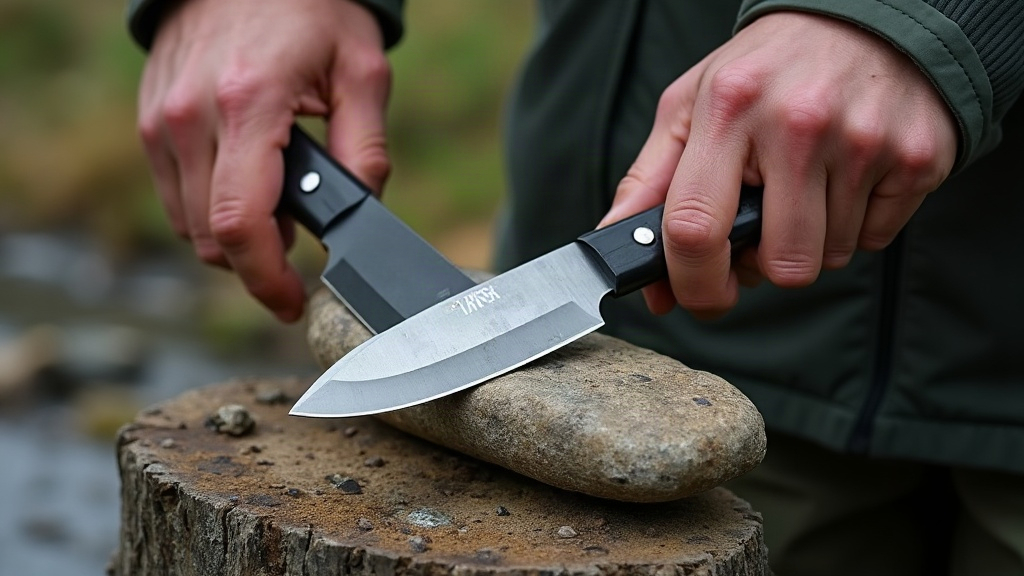
If your Morakniv Companion has gone dull mid-trip and you left your sharpening stone at home, you can still bring back a working edge using nothing but a smooth river rock. Don’t expect razor sharpness out of this. What you’ll get is a knife that cuts rope, notches wood, and processes food again, and honestly, that’s the whole point when you’re miles from the trailhead.
Why This Works
River rocks that have been tumbled smooth by moving water are naturally abrasive at a microscopic level. Sandstone, fine-grained granite, and certain quartzite stones all carry mineral particles hard enough to shave tiny amounts of steel off the Companion’s Sandvik 12C27 blade. And here’s the good part: the Companion’s simple scandi grind actually makes this easier than sharpening a hollow-ground or multi-bevel knife. You’ve only got one flat bevel to match, one consistent angle to hold. No guesswork about where the second bevel starts.
Step 1: Find the Right Rock
Not every rock on the bank will do the job. Walk the shoreline and look for:
- Smooth, flat surfaces, avoid anything pitted, cracked, or shedding loose grit
- Medium grit texture, a rock that feels slightly rough (think fine sandpaper) when you drag a fingernail across it, not glassy and not crumbly
- Sandstone or fine granite, these hold together far better than soft shale, which tends to fall apart mid-stroke
- A size you can actually control, palm-sized, flat on at least one face
A quick test: wet the rock and run your thumb across it. If it feels like a fine grinding surface rather than pure smoothness, you’ve found a candidate worth using.
Step 2: Prep the Rock and Blade
- Rinse the rock in the river to knock off loose sand and debris.
- Wet the blade slightly. Water works as a lubricant here and carries away metal filings, the same way it does on a whetstone.
- If you can, grab two rocks: a coarser one for initial edge repair, a smoother one for refining afterward.
Step 3: Match the Scandi Grind Angle
This is the part that actually decides whether your edge comes back sharp or gets ruined. The Morakniv Companion has a flat scandi bevel, meaning the whole bevel, not just the edge line, needs to sit flat against the rock. On a V-grind knife you’d have to guess and hold a tilt. The scandi grind removes that guesswork entirely:
- Lay the flat bevel completely against the rock surface.
- Keep it flush. Lift the spine even slightly and you’ll round over the edge instead of sharpening it.
- It’s the same “guided angle” trick woodworkers lean on with scandi-ground chisels and knives.
Step 4: Sharpening Strokes
- Push the blade away from you in a slicing motion, edge-leading, like you’re trying to peel a thin layer off the rock itself.
- Switch sides every 8 to 10 strokes so the edge wears evenly.
- Keep pressure light and steady. Let the rock’s texture do the cutting instead of muscling it.
- Keep going for a few minutes. Check progress by feel, a small burr forming along the edge means you’re on the right track, not a mirror finish, which you won’t get from a rock anyway.
Step 5: Strop to Finish
A river rock won’t polish anything, so finish the job by stropping the blade on leather, your pant leg, or even smooth bark. This knocks off the burr and lines up the edge, and it makes a real, noticeable difference in under a minute.
Testing the Edge
Skip the thumb test, it’s not worth the risk. Instead:
- Slice through a green twig or a length of paracord.
- A properly sharpened Companion should peel small curls off wood cleanly, not tear or crush them.
- If the blade drags or shreds instead of slicing, go back for a few more passes, keeping the angle consistent.
Safety Tips
- Always sharpen away from your body, never toward it.
- Keep fingers well clear of the edge path.
- Dry the blade afterward and add a light coat of oil if you have any, even cooking oil works in a pinch, since carbon-bearing steels like 12C27 will rust if left wet.
Conclusion
Sharpening a Morakniv Companion with a river rock isn’t the ideal method, nobody’s claiming that. But it’s a genuinely useful bushcraft skill, one worth practicing before you actually need it. The flat scandi grind takes the angle-guessing out of the equation, and a decent rock off the riverbank can bring back enough edge to keep you working safely until you’re near real sharpening gear again. Try it once at home with a rock from your own yard. That little bit of practice builds the muscle memory you’ll want the day you’re stuck out there with a dull blade and nothing else.